X3 offers two choices for closing a year: Year End Simulation, which creates opening balances without formally closing the previous year, and Fiscal Year Closing, which formally closes a fiscal year. In this post we’re going to walk through a year-end simulation.
A year end simulation is similar to closing a fiscal year in that it calculates the closing balances of a given fiscal year, which then become the opening balances of the next. The difference is that a year end simulation does not create journal entries, and it does not close the year. Because of this, year end simulation is useful for confirming that closing balances are correct, it and can also be used to open a new fiscal year without closing the previous.
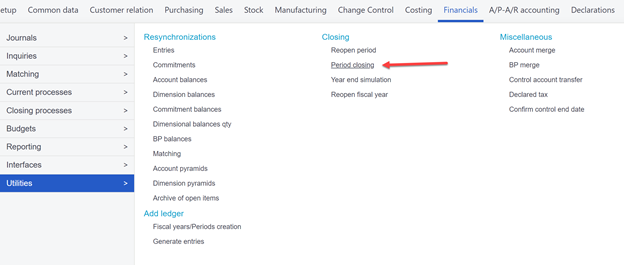
To perform a year end simulation, navigate to Financials > Utilities > Closing > Year end simulation
By default, the simulation will run for the current year(It assumes you are running this function in the year you need to calculate opening balances) and for all companies. If you don’t wish to run this for all companies, uncheck the ‘All companies’ box and define a company in the ‘Company’ field. You will also have to define the fiscal year in the ‘Fiscal year’ field.
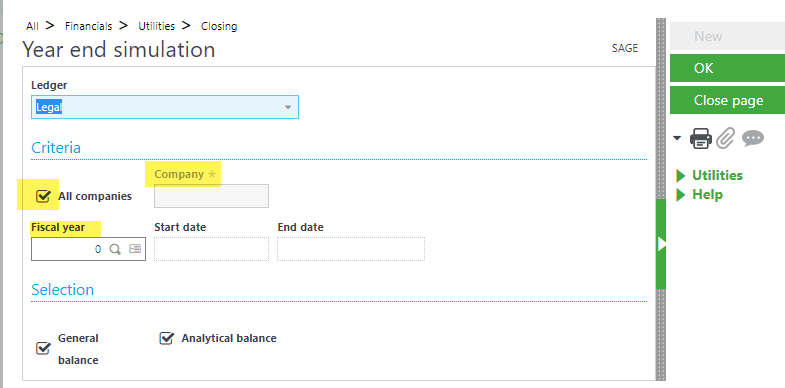
Click OK to run the simulation!
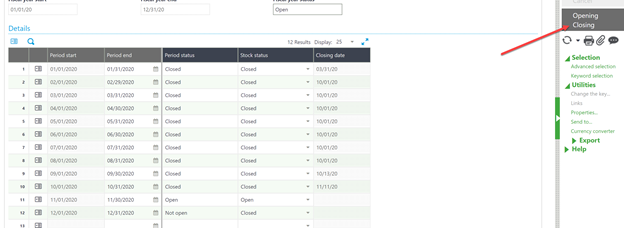
When the simulation is complete, X3 will have populated the opening balances and generated a log file. The log file may contain errors that need addressed and will detail the balance of each account which can be used to confirm it’s correct.
If corrections need to me made they can since the year has not been formally closed. The simulation can be run as many times as needed.
Check back next time when we’ll walk through closing a fiscal year!