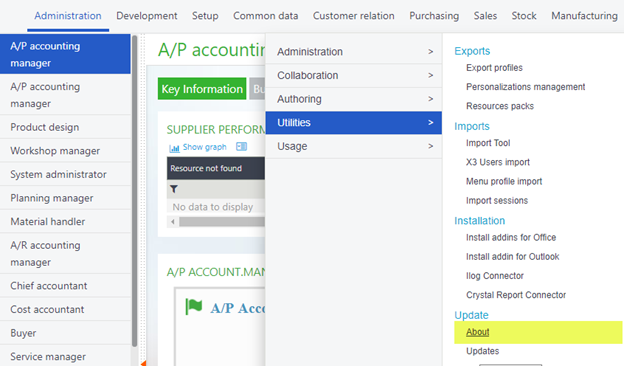
Navigate to Administration > Utilities > Update > About
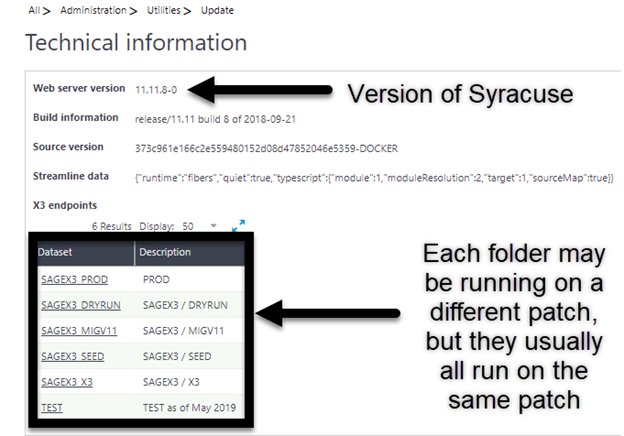
The Web server version section indicates your Syracuse version and NOT your patch version. Those are found under the X3 endpoints grid. As indicated by the footnotes, just because, say PROD is on V11 Patch 9, doesn’t mean that MIGV11 or TEST might be. Each folder is independent as far as the patch of V11 goes, but they all share the same Syracuse version.
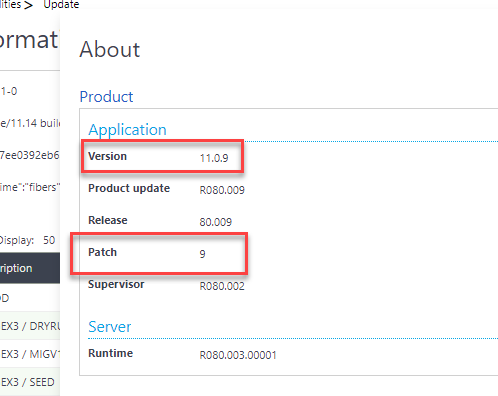
Click on the folder that you need to know the version/ patch and a window will pop up with folder specific information. Here you will find the application version/ patch.
Web services can be a great and easy way to communicate with X3. Being an industry standard, web services allow easy communication between X3 and many outside systems. Using web services allow for real-time transactions and feedback. You will know instantly if your transaction was successfully processed or if an error occurred. SOAP UI software makes testing these services easy. The software replicates a third party product making it easier to identify issues. Templates can also be saved with parameters already defined, making running process quick. In this post, I’ll show you how to connect SOAP UI to X3 and begin a project.
First, you will need to get the web service URL from your X3. Do this by navigating to Administration > Administration > Web services > Classic SOAP Web Services. Highlight the URL, right click & copy the address for later.
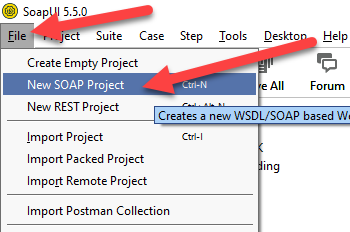
Open your SOAP UI program. (If you need to download the program, go here: https://www.soapui.org/ ) In the top tool bar navigate to File > New SOAP Project
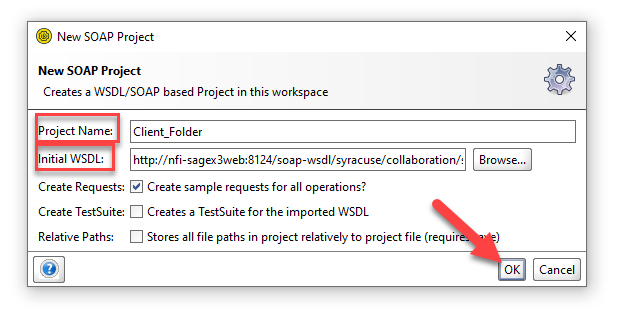
Give your project a name(i.e. Client name_X3 test folder). In the Initial WSDL field, paste the link copied from X3 and press “OK”.
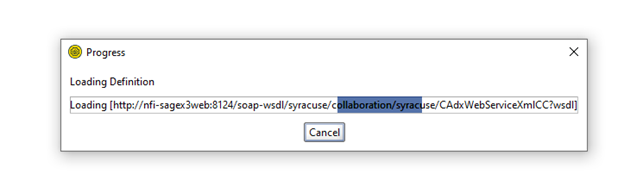
At this point, the program will attempt to make a connection to X3
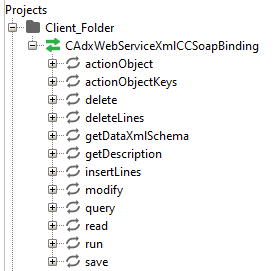
If successful, your project will now be listed on the left hand list of projects with a connection icon below it(two green arrows). If your connection was unsuccessful, check your URL from X3 and try connecting again
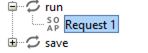
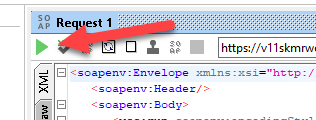
Click the “+” next to the connection to expand your process options. Click the “+” next to the process you’d like to run. In this example I chose “run” . Double click on “Request 1” to start a new run request
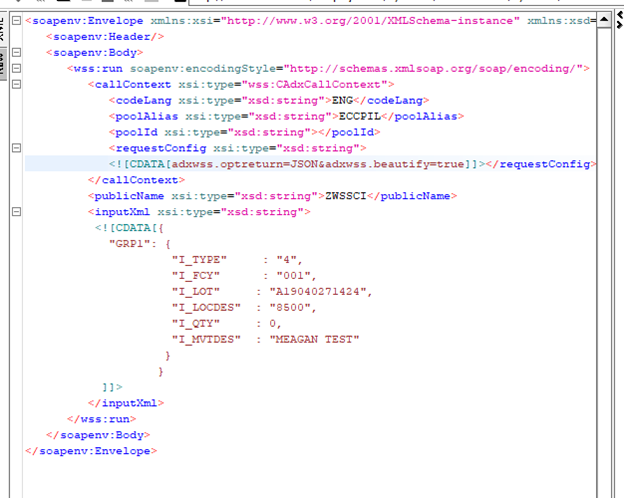
By double clicking a request, a template will pop up for you to edit
Replace the “?” with the relevant information. codeLang = ENG ; poolAlias is the X3 folder you are working in; poolId can stay blank(delete the “?”); request config is the string from the image below(use this if you are using JSON formatting); publicName is the name of the web service created in X3
The information that populates the inputXML/ CDATA tag will differ depending on the web service you are running. In this case, the web service is expecting some input data(in brown text) and if successful, will return a defined output.
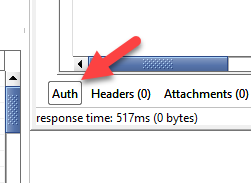
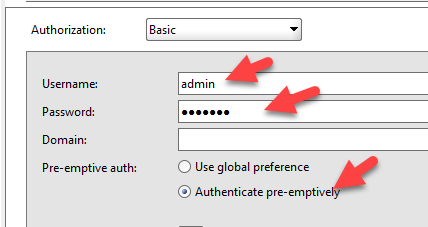
When you have your template filled in sufficiently navigate to the bottom of your work space window where there is a button that says “Auth”. SOAP UI needs to validate your X3 credentials
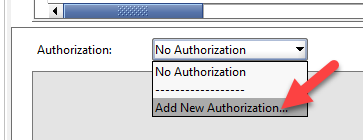
Add a new authorization
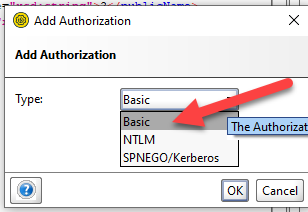
Choose “Basic”
Enter your X3 credentials & click “Authenticate Pre-emptively”
Press the green arrow at the top off the pop up window to run the request
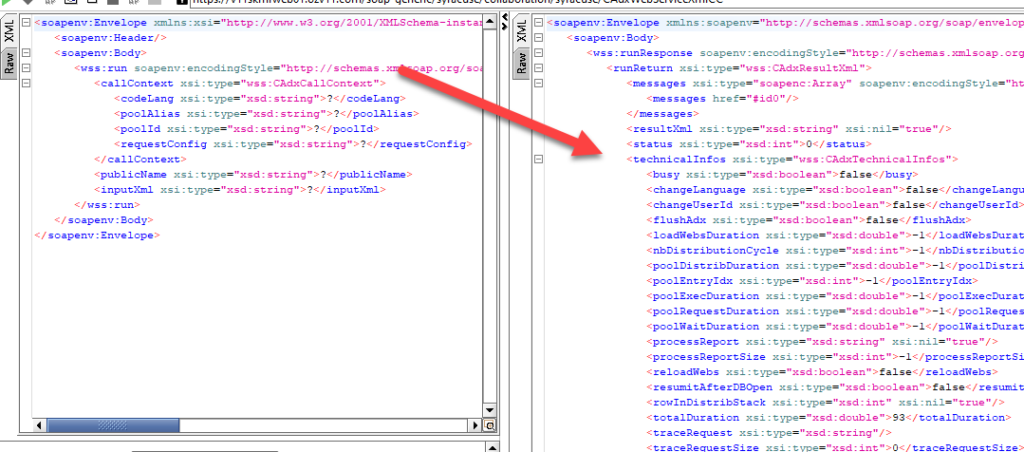
The results will populate on the right side of the window. You may have to do some troubleshooting if you did not get the results you expected.
If there was an error, an error message will be at the bottom of the returned output
For more information or help with web services, please reach out to us at (412) 226-3086 or admin@rebdev.com
Sometimes stock quantities can get out of sync from reality due to may factors. How will you know that this is your issue? Say you are trying to allocate stock to a sales order or are doing a stock change but the system is warning you that there is no quantity of that item. If you know there should be a quantity available, then your stock may be out of sync.
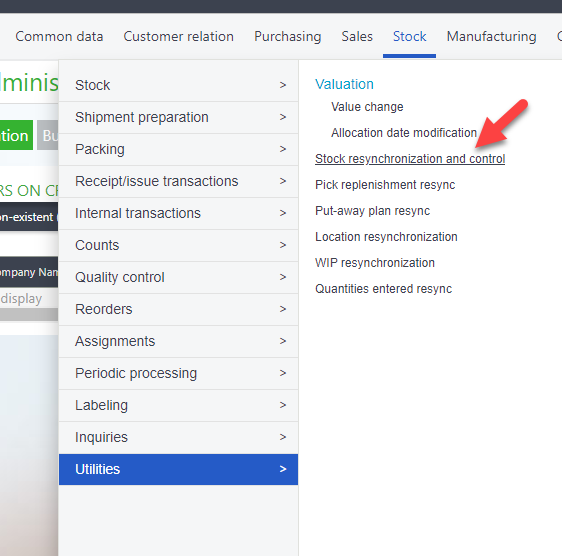
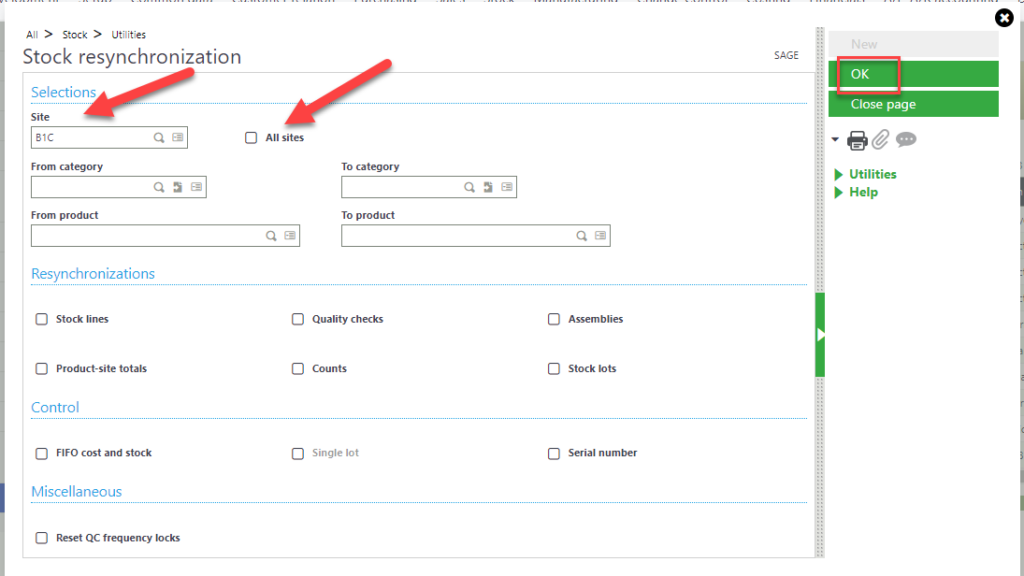
To solve this issue navigate to Stock > Utilities > Stock resynchronization and control
Choose a site, or click the “All sites” checkbox. Fill in a product/category or leave it blank to resync all then choose the relevant check boxes below & click “OK”
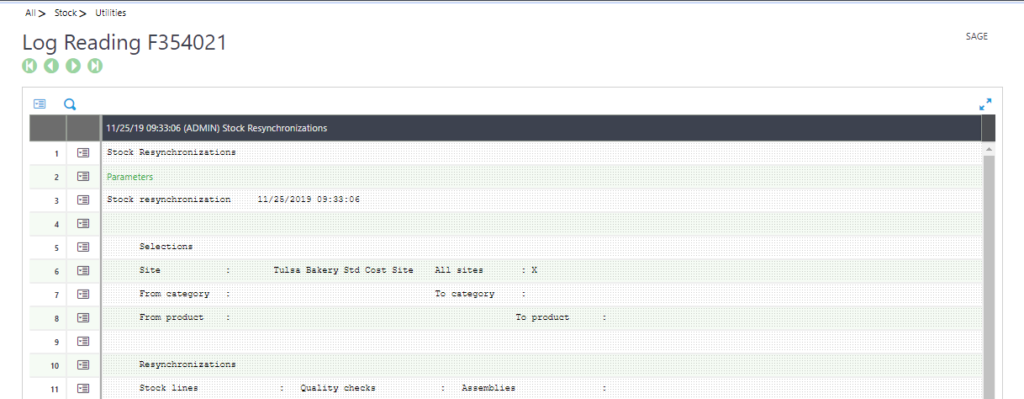
When the resync is complete, you will get a log file. At this point you can try the orginal transaction again.
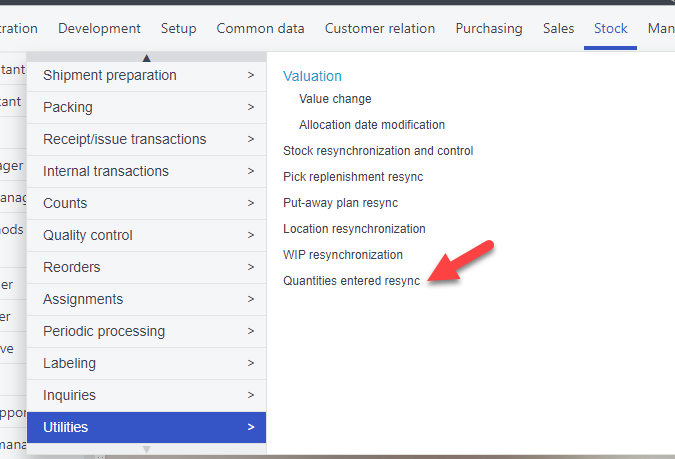
Sometimes, this is enough to put the stock back in order but if not, you may need to take an extra step. Navigate to Stock > Utilities > Quantities entered resync
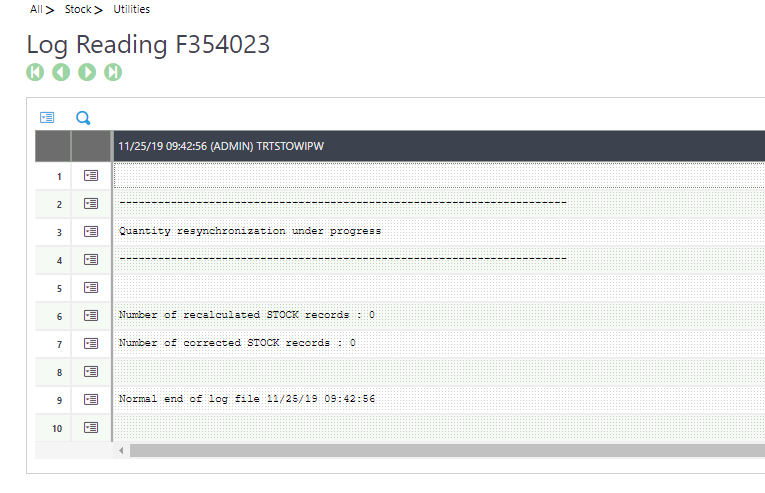
The process is complete when you get a log file. If you get errors, run the quantities resync again.