Year-end: Closing a Fiscal Year

In the last post we walked through how to run a year end simulation and it’s benefits(Read it here if you missed it). The other option to close a fiscal year is using the Fiscal Year End function.

A year end simulation is noncommittal – it creates no entries, nor does it close the year – allowing entries to still be made. When you are ready to formally close a fiscal year, the process is slightly different.

Begin by navigating to Financials > Closing processes > Fiscal Year End

On the following screen, enter the company for which you will be closing the year. Beside it, in the All ledgers column, the default value is yes. Change this to No.

Tab through the remaining fields. The earliest open fiscal year will populate the New Fiscal Year field and not necessarily the current year. ANX document / journal and ledger fields will automatically populate.

Lastly, make sure the Simulation box is not checked, and press OK from the right hand menu.

If any errors occur, X3 will produce a log file detailing what needs resolved before the year can be closed. If there are no errors, the file will list all of the entries made and close out the year. Adjustments can no longer be made to this fiscal year.
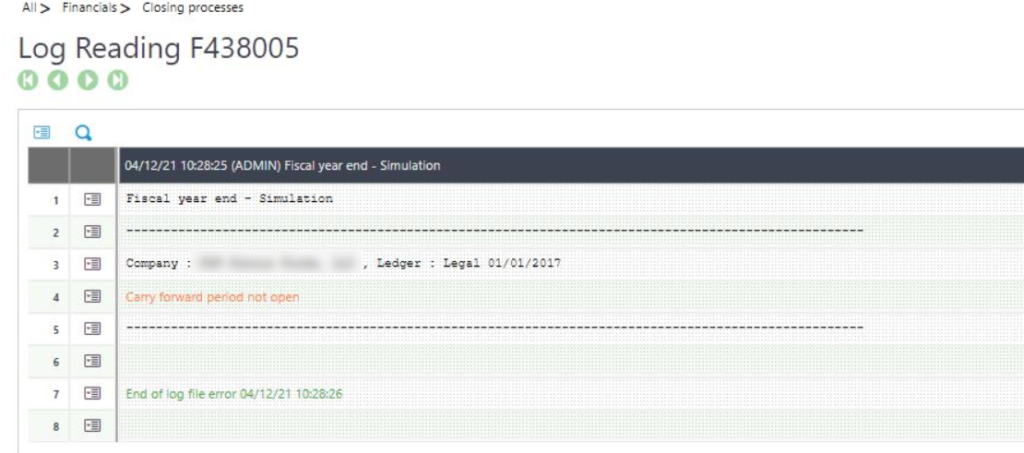
Example of an error log

Common Accounting Issues In X3

We’ve collected a list of 3 of the top accounting issue we see in X3.

  1. Period needs to be closed

Periods in your X3 system need to be closed to ensure past balances aren’t affected and it’s a good organizational practice. If you are making entries to a reopened period navigate to the Periods function under Common Data> General Accounting tables and close your period here.

Otherwise, if no new entries were made, navigate to Period Closing under Financials> Utilities> Closing and close your period here.

2. Accounting Tasks

If you receive errors while closing a period or year, but are certain all entries have been posted and validated, make sure that Accounting Tasks is running. Navigate to Usage > batch Server > Accounting Tasks. If the status on the line is not ‘Active’, and journals are on hold, press Run now and try closing the period again.

3. Missing Opening Balances

If you have simulated but not closed a year end, and have later then utilized one of the resynchronizations under Financials > Utilities > Resynchronizations, you may find that your opening balances in X3 seem to have disappeared. This is due to the fact that simulations do not create actual journal entries – a resynch can reset this data. To bring your opening balances back, simply run another year-end simulation.

To finalize the opening balances, run the standard year end closing processes

What’s New in SEI V9: Finance UDM Pt. 3

Last time we walked through how to publish your account mappings and build/load the Accounts cube. Now you are ready to tackle the report blueprint!

The report blueprint is just as it sounds; a blueprint from which to build your financials. In this step we will define account groupings and signs(+/-).

Begin by navigating to the ‘Report Builder’ process.

Expand this process and double click to open the ‘Report Blueprint’.

In this report, you will see groups defined in the first column. There are default groups which you can utilize or create your own. To create your own, we will utilize the info pages.

Right click on the Report Builder process and choose ‘View Info Pages’

Here we are going to utilize the ‘Create New Report’ section. Enter a report code and choose a language. Depending on your database, choose the SQL Server only option or the ORACLE only option.

Open the Report Blueprint to see your new report code. In this report you will define the account groupings. For example, our first level (Level 01) is the general account name: Assets.

Our Assets account can then be divided into Current Assets and Fixed Assets (Level 02).

You may stop here, or maybe you need to get more granular. In Level 03 you can see we break up Current Assets into Cash, Accounts Receivables, Inventory and Other Current Assets. The Fixed Assets definition stops at Level 02.

So now we have our levels defined, next step is to associate the account groups. These groups come from the Account Mapping report. A group will be placed in either the ‘Keep Sign’ or ‘Reverse Sign’ column.

In our example, the account groups for Current and Fixed Assets are in the ‘Keep Sign’ column. The previous steps will be repeated for you other account groupings.

After everything is mapped here, we must save the data and publish the report as we did for the Account Mapping report.

To do this, click on the save disk, ‘Save Data’ then ‘Save’.

Close the report. Right click on the Report Builder Process and choose ‘View Info Pages’. Fill in the Report field with your report code and click the update button that matches your database (SQL or ORACLE).

Now you are ready to begin creating your Financial reports!