When entering an expiration date in the Lot Mass Change function or Characteristics change function, the year might default to 19xx. For example, you might set the date to 3/1/30 but the date then defaults to 3/1/1930 when you meant 2030. This causes your lot to be expired and unusable!
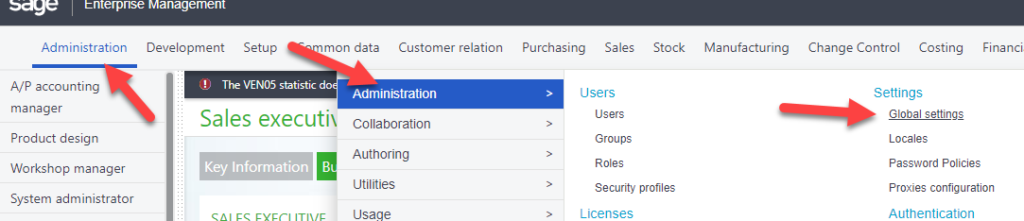
To resolve this, navigate to Administration> Administration> Global Settings
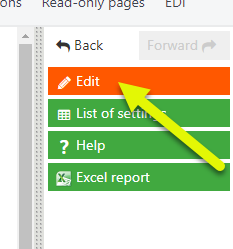
Click “Edit” on the right hand panel
Change the upper bound of two digit year expansion interval field to your desired year
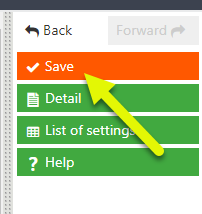
Click “Save” on the right hand panel.
Now when 3/1/30 is entered, the date will display as 3/1/2030
Sometimes the left list in a function can be a bit overwhelming when it contains every record. Did you know it’s possible to created another left list that contains only the data you need? Below are the steps to create a browser object with filter criteria. By following these steps a ‘drawer’ or ‘tab’ on the left list will be created making it quicker and more simple to find the records you need to see.
Navigate to Development > Script Dictionary > Objects
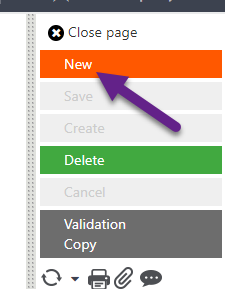
Click ‘New’ to start a new record
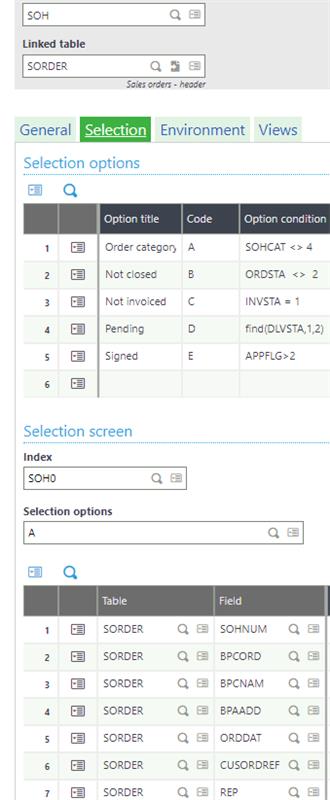
Give your object an identifying code & a description. Use the selection icon to choose a linked table
On the General tab, give your object an activity code and choose ‘Browser’ as the management type.
Also on the General tab, make sure your standard & specific script names populate. You will need the specific script name later.
Usually on an object you pick, from the linked table, which fields to display, as below. The SOH object, for example, in the selection screen block, you would define an index (SOH0) then specify a table and field from that table to display. For our browser object, we will do this in the specific script.
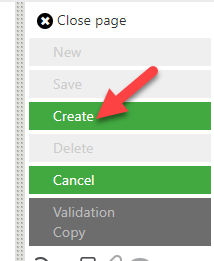
Click the ‘Create’ button to create your object.
Create your specific script and add the following piece of code to the Action label:
When "CLE_GAUCHE" : Gosub CLE_GAUCHE
This action is called before loading the left list
Next, create the action label block:
$CLE_GAUCHE
return
This is where you will define the filter criteria for your left list drawer by using the variable ‘FILTSUP’. The filter criteria is expressed in a string with logic to combine criteria. See below for an example.
FILTSUP = 'SOHCAT = 4'
This will filter the left list for sale orders that are categorized as contract types. If you need a more complex filter see how to add more criteria below.
FILTSUP = '(SOHCAT = 4 OR SOHCAT = 3) AND CPY = 111'
This would filter the left list for sale orders categorized as contracts or direct invoice and also looking for the company to be ‘111’.
###########################################
$ACTION
Case ACTION
When “CLE_GAUCHE : Gosub CLE_GAUCHE
Endcase
###########################################
$CLE_GAUCHE
FILTSUP=FILTSUP = '(SOHCAT = 4 OR SOHCAT = 3) AND CPY = 111'
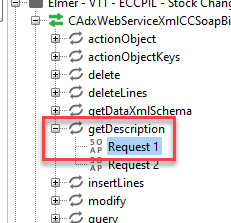
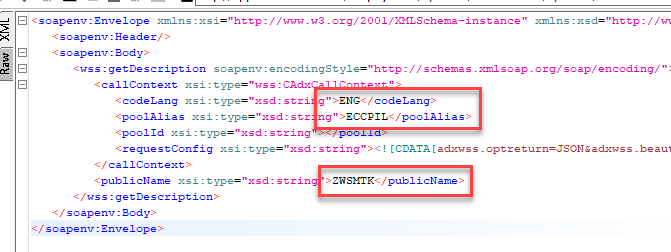
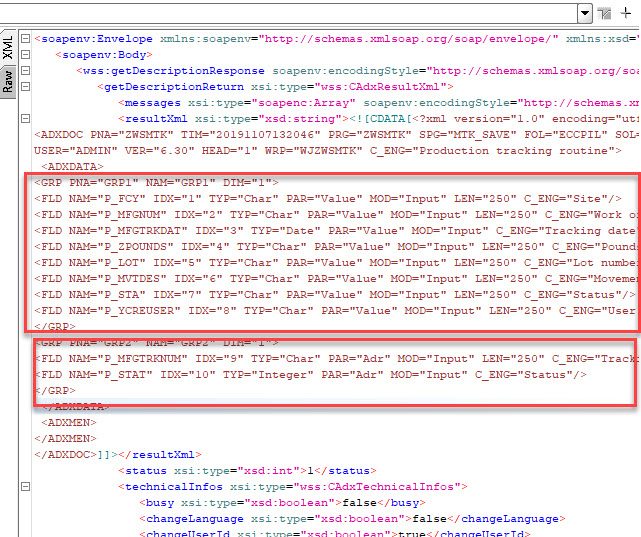
SOAP UI is a powerful and easy to use tool to test web services. In a previous post I showed you how to start a SOAP UI project and execute a run request. There are other requests to run in SOAP UI so this week will be how to set up and execute a “getDescription” request. This request can be useful to see what information the web service is expecting to handle.
SOAP UI is a powerful and easy to use tool to test web services. In a previous post I showed you how to start a SOAP UI project and execute a run request. There are other requests to run in SOAP UI so this week will be how to set up and execute a “getDescription” request. This request can be useful to see what information the web service is expecting to handle.
Sometimes functions get locked by user sessions that are not being used or have not timed out yet. If needed, user sessions can be terminated. To do this, you must have access to the development menu.
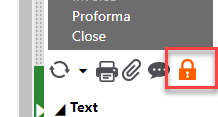
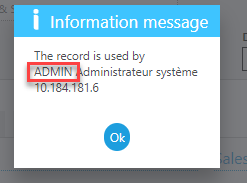
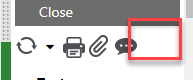
To see who the record is locked by, click the lock icon ont he right panel which will pop up a message box with the user’s login. Save this information for later
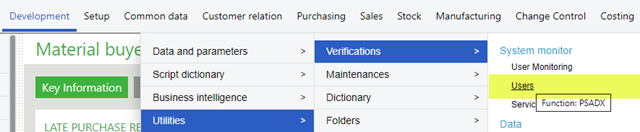
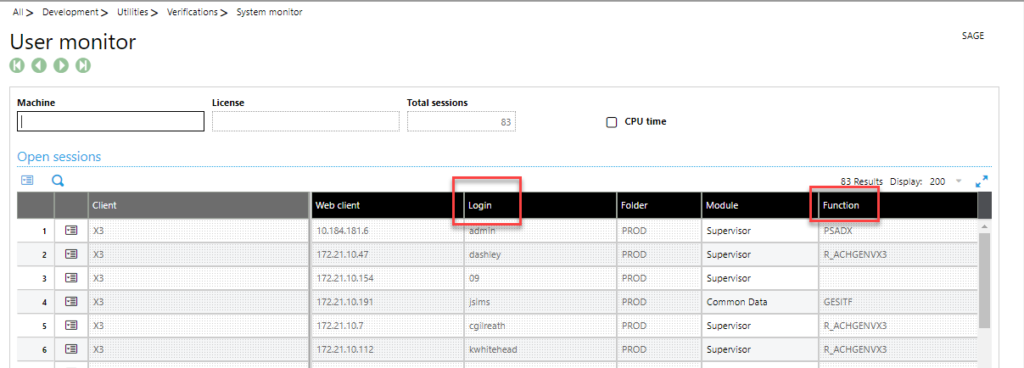
Navigate to Development > Utilities > Verifications > System Monitor> Users
In the grid, find the user login and the session containing the function name where the record needs unlocked.
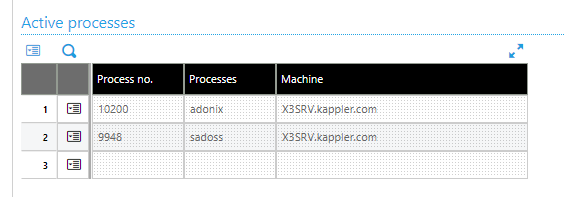
Click the line and scroll down the page to the Active Processes grid
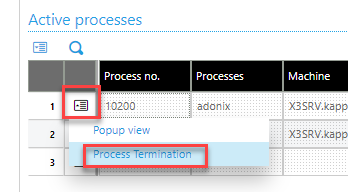
It does not matter which line you choose to terminate. Click the action card of a line & choose ‘Process Termination’
Navigate back to the function where the record was locked. To confirm the record is unlocked, check that the orange lock icon is no longer present on the right panel.