What’s new in SEI V9

In this article I’ll highlight some of the changes and updates to the reporting tool.

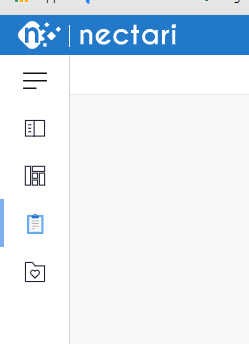
V9 of SEI comes with multiple updates and advantages. First, you’ll notice the color change. The interface is now a pleasant blue and white, which mimics the color scheme of Sage X3 v12. You’ll then notice some of the icons and labels have been updated as well.

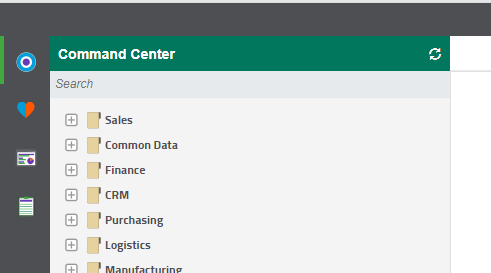
In the command center you’ll notice the extra 3 lines button at the top now. This allows you to expand or collapse the side panel. Next you’ll notice that the icon have changed & shifted positions. Looking at V9, going down the panel, you now have the Data Models and Views, Dashboards, Reports, and Favorites.

SEI V9 Command Center
SEI V8 Command Center

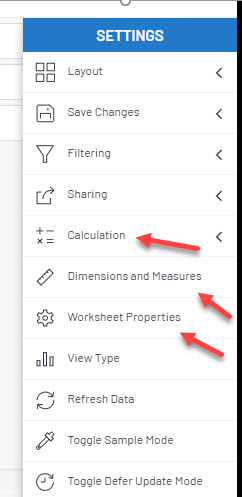
Icons and name changes were also made to the report tools. Looking at V9, you’ll see the calculation option has changed to operations signs, Dimensions and Measures icon has changed to a ruler, and the Worksheet Properties option has changed to a gear.

SEI V9 Report Tools
SEI V8 Report Tools

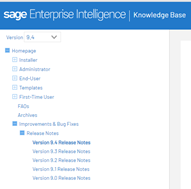
Along with some cosmetic changes, new features and reports have been added as well. First, documentation has moved online making it easier to find what you need.

On the left you’ll find an easy to navigate index of topics and a search bar on the top right

Next, let’s look at what’s new with the reports (Views). You can now add images and HTML links into worksheets. They’re even exported when sharing a worksheet to excel.

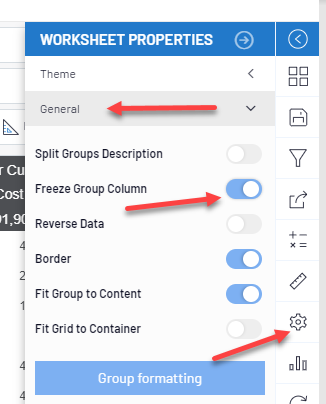
A freeze group column property has been added allowing the groups column to stay in place while scrolling to the right.

Lastly, lets look at the report scheduler. If you’re not using this feature, you should! It allows reports to be sent out on a schedule for ease of visibility and use. Before version 9, a scheduled job had to be created for each report to send. However, now, you can define multiple reports to send per job, making the process more efficient and allowing the recipient to see all of their reports in one place. Simply add all of the reports in the ‘Web Views’ tab and then manage them in the ‘Consolidated report” tab.

For more features check out the SEI Knowledgebase (https://onlinehelp.sageenterpriseintelligence.com/Latest/en/Home.htm) or contact us at (412) 226-3086 or admin@rebdev.com.

How to eliminate the ENDDAT parameter error

Going into the new year, you may encounter this error message:

This is because ENDDAT parameter value needs to be updated to reflect the new year.  This HTG will show you how to get rid of that warning.

Open Setup-General parameters-Parameter values

On the Parameter values left list, expand SUP Supervisor, then Folder and select your folder (usually the only folder option you will have is the one you’re logged into).

On the main screen, find DEF (Default values), click its action card and click Details.


Now we’ve finally reached the parameter that’s causing that warning to appear: the ENDDAT parameter.  It will be 12/31 of the year that just ended.  You will need to change the year to the year we’re currently on (keep the 12/31 part).  For example, if 2019 just passed and we’re now on 2020, you need to change the ENDDAT value from 12/31/2019 to 12/31/2020.  Click OK when done.

Make sure you click Save on the main screen after clicking OK. Otherwise the change won’t actually stick.

You will have to log out of Sage X3 and back in before this take effect.

How-to Series: Adding an Endpoint in X3

This is a useful how-to for when you need to add a new endpoint to X3 whether you are setting up a new system or just need a new test folder. For this how-to, images will be referencing V12, but the steps can be replicated in most versions of X3.

  1. Navigate to Administration >Administration > Endpoints > Endpoints

2. Click the “Actions” button on the right hand side of the screen. in other versions you may skip this step to go to step 3

3. choose “New endpoint” from the right hand side

4. On this page you will need to define some parameters for you folder.

  • NAME/DESCRIPTION: The name/ description will appear when it is referenced on a page in X3.
  • APPLICATION: Choose the X3 ERP application which defines the type of software the endpoint refers to.
  • SERVER PARAMETERS: Server parameters define the connection your folder has.
    • X3 SOLUTION: For ERP endpoints, choose the X3 server(in this case it has been named SAGEX3 during set up) from a list.
    • SERVER FOLDER: The server folder defines the code the endpoint is connected to which can be typed into the field.
  • GROUPS: Define groups that have access to your new folder by using the magnify glass icon.

5. when you have this page filled in click save on the right side of the screen. log out, then back in and make sure you folder is available to access.

How-to Guide Series

Hello fellow Sage users/ code writers!

This is the first in a series of “how-tos” relating to using Sage X3 or using the 4GL language to make modifications to the system. While there is a knowledge base out there with excellent information, it’s sometimes difficult to navigate or get a straightforward solution.

The first in this series will begin with a How-to turn a function into a menu item and then place it in the navigation menu to access it.

  1. Navigate to Administration > Authoring > Pages: Menu Items

2. On the right hand menu, select “Create menu item”

3. Fill in the required fields and hit save. Do not assign the menu item to a specific endpoint

4. Now that you have a menu item, we can add it to the navigation menu. To do this, navigate to Administration > Authoring > Pages: Navigation pages

5. Choose “home”

6. Choose “Edit page content” from the right hand menu

7. Choose the module and submodule to place your menu item

8. Click the “Select menu item” under the Menu title

9. Search for the menu item you created, select it, then press the blue check in the upper right corner. The menu item should now be listed under the Menu title

10. Navigate back to the home page and then navigate to your menu item location. Sometimes you have to complete a couple extra steps if it doesn’t appear on the navigation menu.

11. Navigate to Development > Utilities > Dictionary > Validations: Site Function Profiles

12. A verification message will pop up warning that the process might take time to compete. Click yes to continue.

13. When this function has finished, log out of X3 and back in, Navigate to your menu item.